

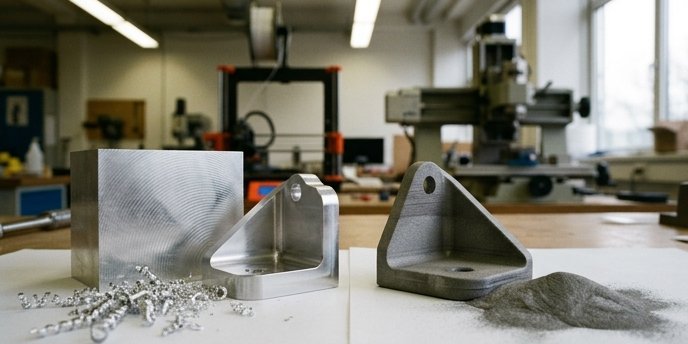
TL;DR: 3D print for complex geometry, early iteration, and runs under about 10 units. Go CNC for functional testing, tolerances tighter than ±0.05 mm, and production-grade material properties. For aluminum brackets, CNC usually overtakes SLS somewhere in the 25–50 unit range. And there’s a third option most people skip: print a near-net blank, then machine the critical features. Decision matrix at the bottom.
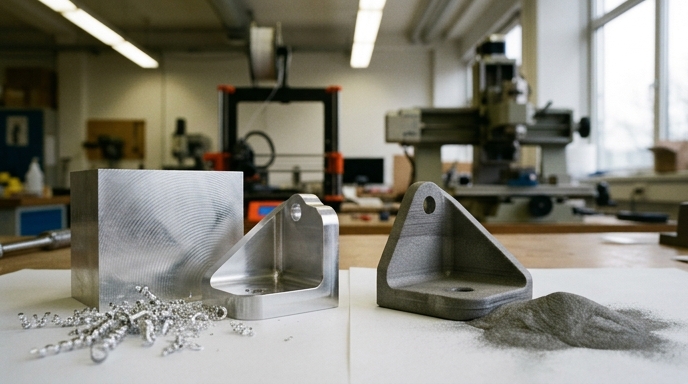
The Real Decision Isn’t “Which Process” — It’s Which Prototype Stage
Most engineers frame this debate around part geometry. That’s the wrong filter. The better one is where you are in the development cycle, because each stage asks for a different output.
Concept modeling is a speed-and-cost game. FDM or SLA will get you five to ten housing iterations in a week, and material properties don’t matter because you’re checking form and fit. That’s it.
Functional testing changes everything. If a bracket has to hold a 50 kg dynamic load, an FDM PLA print tells you nothing useful. You need CNC or DMLS so you’re testing something that behaves like the production material under stress.
Pre-production validation is where you match the end process as closely as you can. Die-cast or injection-molded end part? CNC-machined aluminum or tooling board is your closest mechanical proxy. If the production path is MJF, your prototype should be MJF too. Prototyping in a process that doesn’t mirror the end part is how people end up surprised at PPAP.
Cost Crossover: Where CNC Becomes Cheaper Than 3D Printing
Subtractive and additive have inverted cost curves. 3D printing is basically flat per unit, with almost no setup. Upload the STEP, let the nesting software do its thing, hit print. Unit 1 and unit 100 cost about the same each.
CNC front-loads everything. Somebody has to write the CAM, build or pull fixturing, and dial in tools. That’s typically 1–3 hours at shop rates of $75–$150/hr before a single chip hits the floor. So unit 1 is painful. Unit 50 is a bargain.
For a standard 50 mm 6061-T6 bracket with four features:
- Volume 1: DMLS wins by a mile. CNC eats the entire setup on one part.
- Volume 10: CNC starts to look reasonable; per-part cost falls 60–70%.
- Volume 50: CNC is usually cheaper. Billet is less expensive per gram than metal powder, and cycle time per part keeps dropping.
In the metal bracket world, the crossover tends to land between 25 and 50 units. Polymers behave differently — somewhere around 500 units, injection molding eats both processes anyway.
Tolerance and Surface Finish: What You Actually Get
Standard CNC runs to ISO 2768-m, which is roughly ±0.125 mm. Precision CNC routinely holds ±0.025 mm (±.001″), and a good shop will hold tighter than that on specific features if you flag them.
3D printing tolerances are all over the map depending on the process:
- SLA: around ±0.05 mm (best polymer accuracy you’ll see)
- DMLS: ±0.1 to ±0.2 mm
- FDM: ±0.2 mm
- SLS: ±0.3 mm, and it drifts with humidity
Surface finish is where the gap widens. A standard endmill leaves roughly 3.2 µm Ra (125 µin); a finishing pass can get you to 0.8 µm (32 µin) straight off the machine, no secondary work.
DMLS parts come out of the chamber at 5–10 µm Ra. They look and feel like cast sand. If you want anything close to a machined finish, you’re bead blasting, tumbling, or going back to a mill for the critical faces — which, you’ll notice, defeats part of the point.
Material Reality — “Aluminum Is Aluminum” Is a Lie
Writing “aluminum” on a drawing doesn’t tell you how the part will behave. The process matters as much as the alloy.
Take 6061-T6 billet versus DMLS AlSi10Mg. Machined 6061-T6 runs about 276 MPa yield with 12% elongation at break. DMLS AlSi10Mg lands around 230 MPa yield, and elongation collapses to 3–5%. The printed part is meaningfully more brittle, even though the datasheet strength numbers look close enough that someone will try to swap them.
Then there’s anisotropy, which still bites people who should know better. Layer-by-layer builds are weaker in Z than in X-Y. A DMLS titanium part might hit 95% of machined Ti-6Al-4V’s UTS in-plane and fail 15% earlier when you pull it along Z. Billet is isotropic. Powder-bed isn’t, and no amount of HIP post-processing fully closes that gap.
Polymer side is just as messy. Machined Delrin (POM) is isotropic, wear-resistant, and predictable. SLS PA12 is porous and hygroscopic, which means your dimensions move depending on where the part has been sitting. I still spec machined Delrin for anything with a sliding fit, even on parts where SLS would be fine on paper — old habit, probably overcautious, not going to apologize for it.
Geometric Freedom vs. Geometric Reality
3D printing ignores most traditional manufacturing constraints. Internal conformal cooling channels, lattices, consolidating a six-part weldment into one print — this is where additive earns its keep. If your design came out of a generative topology tool and looks like a bone, you’re printing it or you’re not making it.
CNC lives and dies by line-of-sight. The tool has to physically reach the feature. Sharp internal corners don’t exist for a round endmill; you’re either designing in dog-bone reliefs or paying for EDM, and EDM is not cheap.
But CNC wins in places additive quietly struggles. Long thin walls in metal machine fine. In DMLS, thermal gradients from the laser will warp those same walls or tear them off the plate. Deep straight bores, bearing press-fits, anything that wants a real H7 — that’s CNC territory, and trying to print it and ream it after is usually slower than just machining from stock.
Lead Time: The Nuance Beyond “3D Printing Is Faster”
Marketing copy loves “overnight parts.” That’s true for a desktop FDM running PLA in 4 hours. It is not true for production-grade additive.
DMLS and SLS want a full build chamber to pencil out economically. The print itself is 24–48 hours. Then the chamber has to cool — often roughly as long as the print ran, because you can’t just yank hot powder and parts without inducing thermal shock. Operators depowder by hand, cut parts off the plate on a wire EDM, and send them through a stress-relief bake. Door-to-door, you’re looking at 3–5 days in most shops.
Service bureaus like Xometry and Protolabs will have a straightforward 3-axis CNC part on your bench in 2–3 days. No cooldown, no powder removal, no bake cycle. Once the program is written, a finished aluminum part comes off the machine in minutes.
The Hybrid Workflow Nobody Talks About
You don’t have to pick one. Hybrid manufacturing gets you the geometric freedom of additive and the precision of subtractive on the same part.
The workflow: DMLS or binder jet prints a near-net blank, which carries the internal lattices, conformal channels, whatever shape you couldn’t machine from stock. Then that blank goes into a 5-axis mill and you cut the bearing journals, threaded holes, and mating faces to ±0.025 mm.
Aerospace and medical prototyping run on this. Hogging a complex bracket out of a Ti-6Al-4V or Inconel 718 block wastes up to 80% of the raw material as chips — and that chip pile isn’t cheap when it’s titanium. Print the blank, machine the features that actually matter, keep the rest of the material in the part instead of the recycle bin.
Obviously you still need to fixture the printed blank somehow, which is its own small headache.
Decision Framework — Five Questions
Answer in order:
- Volume? Under 10 favors 3D printing. Over 50 favors CNC.
- Tolerance? Any feature tighter than ±0.1 mm, you’re going CNC or hybrid.
- Material? Need isotropic metal properties, or a specific engineering plastic like Delrin? CNC.
- Geometry? Internal channels, lattices, consolidated assemblies — print it.
- Stage? Concept to FDM/SLA. Functional and pre-production to CNC or DMLS.
If two answers point opposite directions, the tolerance question usually wins.
FAQ
Is 3D printing or CNC machining more accurate?
CNC. Standard CNC holds ±0.125 mm, precision CNC gets to ±0.025 mm. The tightest common 3D process (SLA) tops out around ±0.05 mm.
Can you 3D print metal as strong as machined metal?
Mostly. A printed metal part will reach 85–95% of the mechanical strength of its machined equivalent in the best direction, but with directional weakness and reduced elongation. DMLS parts are more brittle than billet, they fail earlier along Z, and the fatigue life gap is bigger than the UTS gap would suggest. If the part sees cyclic loading, that difference matters more than any datasheet comparison. Design around it or machine the critical load paths from stock.
What’s the minimum volume where CNC becomes cheaper than 3D printing?
Usually 25 to 50 units for metal brackets. Exact crossover depends on how fast the CNC setup amortizes against the flat per-part cost of printing.
Which process is better for functional prototype testing?
CNC, if the end part will be machined or cast. The isotropic properties reflect real-world behavior under load.
Do engineers use both CNC and 3D printing on the same part?
Yes — hybrid manufacturing. Print a near-net blank in something expensive like titanium, then finish the mating surfaces and bearing journals on a mill.
Author Bio: Mechanical engineer with a background in rapid prototyping and DFM, specifying subtractive and additive workflows for aerospace and consumer hardware.